


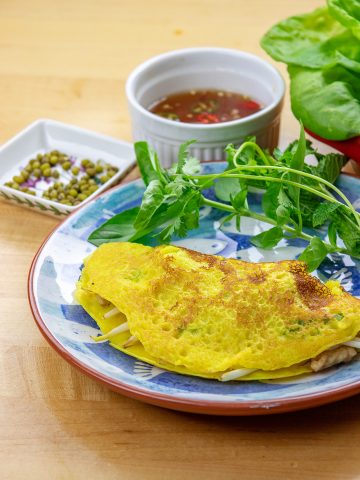
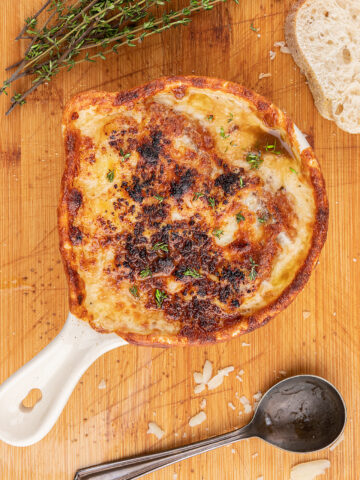
Elevate your brunch game and try Khachapuri, a gourmet twist on the egg, cheese, and toast classic. This distinctive dish with its unique boat shape, crowned with a perfectly cooked egg in the center, looks as exquisite as it tastes.

What is Khachapuri?
Khachapuri is a gourmet breakfast bread that is baked with an egg on top of a bed of gooey, molten cheese. It is the national dish of the country of Georgia and a very popular dish in the Black Sea area.
Khachapuri has numerous variations based on the type of ingredients available in the region and household preferences. The boat-shaped kind described in this recipe is known as Khachapuri Adjaruli.

Why make Khachapuri Adjaruli?
- It's easy to make. The whole dish requires only 30 minutes of prep time, and the process is very easy.
- Sensational Flavor: It's the gourmet version of the classic egg, cheese, and toast sandwich.
- Cultural Experience: You get to experience the rich culinary heritage of the national dish of the country of Georgia.
- Impressive Presentation: Its distinctive boat-like shape makes it a showstopper at any table, perfect for wowing guests or indulging in a special treat for yourself.
- Versatile Ingredients: You can customize the filling to suit your preferences, making it adaptable to dietary restrictions or ingredient availability.
- Ultimate Comfort Food: It's a cozy, hearty, and indulgent meal that's perfect for brunch, lunch or a side to soups and stews.
Ingredients
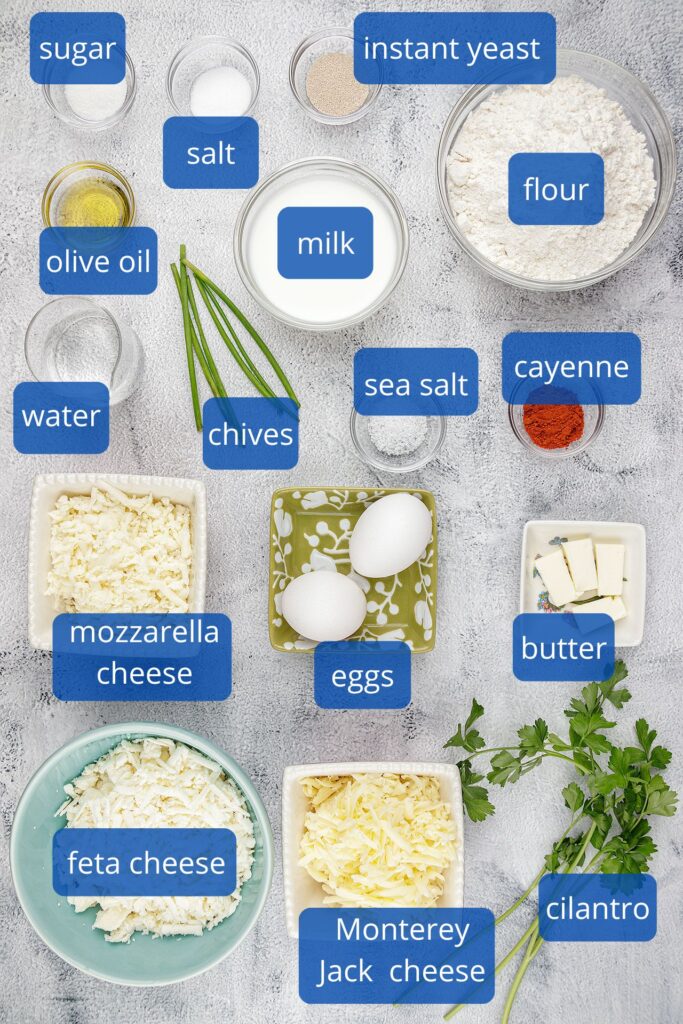
- Mozzarella, Feta and Monterey Jack Cheese. Since the traditional cheeses used in native Georgian Adjaruli Khachapuri like imeruli and sulguni cheese, are difficult to find in local groceries, we suggest using low-moisture mozzarella and feta cheese, which provide a similar taste and texture. In this recipe we have combined these delicious cheeses with Monterey Jack cheese for an additional layer of texture and flavor.
- All-purpose flour. We use all-purpose flour because we always have it in our pantry. You can also use bread flour.
- Warm water and milk. In his book, Flour Water Salt Yeast: The Fundamentals of Artisan Bread and Pizza, Ken Forkish talks about the importance of thinking about time and temperature as ingredients. In baking, timing and dough development is critical - the lukewarm water temperature is important because a warm dough will develop faster than a cooler one.
- White granulated sugar. Adding sugar is a modern method used to feed the yeast to speed up fermentation. Sugar also helps to brown the bread.
- Fleischmann's instant dry yeast. Instant dry yeast is used instead of active dry yeast in this recipe to save time.
- Table salt is used to season the dough. You can also substitute with an equal amount of fine sea salt.
- Olive oil is used to grease the containers to proof the dough. It also infuses the dough with a rich, savory flavor. If you don't have olive oil, use a neutral oil like vegetable or canola oil.
- Cilantro, chives, sea salt and cayenne pepper are optional and used to garnish the khachapuri. You can also keep it simple and just use salt and freshly ground black pepper or your favorite herbs.
How to make Khachapuri
Make the dough
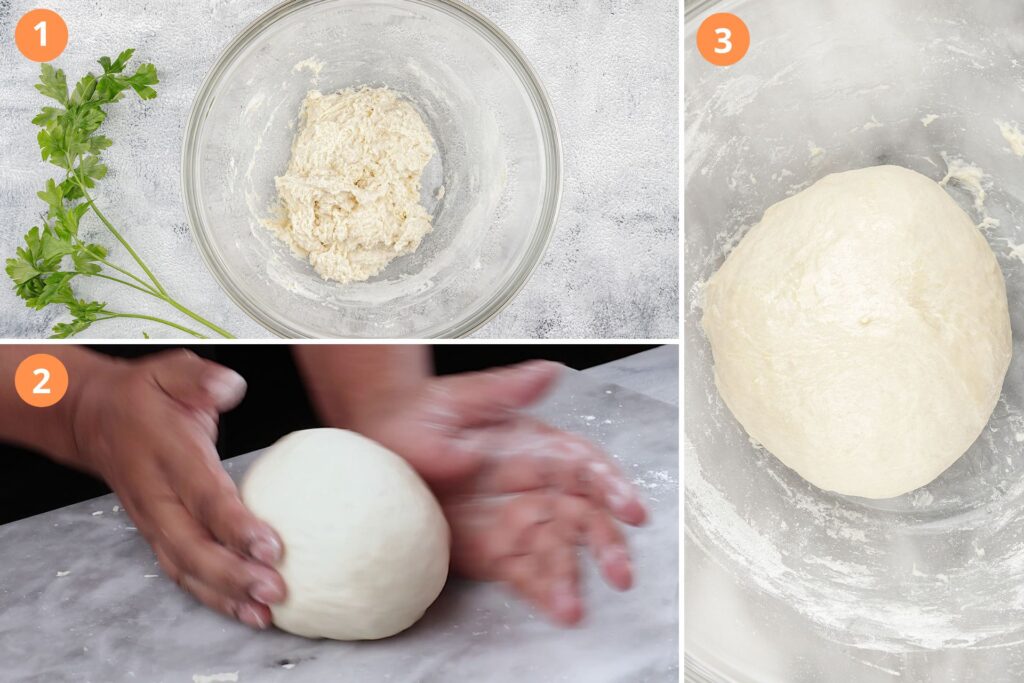
- Mix the dough: Add the warm water, instant dry yeast, and sugar to a bowl. Mix vigorously with a whisk. Add warm milk, olive oil, flour, and salt. Mix with a wooden spoon or Danish dough hand whisk until no dry dough is visible. The dough will be shaggy and wet.
- Knead the dough (3 minutes): Using a dough scraper or a large spoon, scrape the shaggy dough into a ball and transfer it to a lightly floured surface. Sprinkle some flour on the dough ball and knead the dough for about 3 minutes by pulling out long bits from the side and pressing it into the center. Once the dough is smooth and silky, tighten is into a ball by pressing it with both hands in a rotating motion.
- Proof the dough: Place the smooth dough ball into a mixing bowl. Drizzle with a little olive oil. Smear the olive oil all over the dough ball including the bottom. Cover and proof for about 1 to 1 ½ hours in a warm place or until the dough doubles in size.
Prep while the dough proofs

- Mix the cheese: Mix the shredded feta, Monterey Jack cheese and mozzarella in a medium sized bowl. Set aside and store in the refrigerator until ready to use.
- Prepare the parchment: Cut some parchment paper into two 12x15 inch rectangles. Sprinkle the parchment rectangles with a little flour.
Shape and stuff the Khachapuri

- Preheat the oven at 475°F: Once the dough has doubled in size, begin preheating the oven. Set the oven rack in the middle.
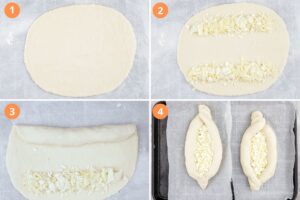
- Roll out the dough: Using a plastic dough scraper or a large spoon, loosen the proofed dough from the sides of the large mixing bowl and pour onto a well-floured surface. Shape the dough into a circle and cut the dough into two pieces using the dough scraper. Take one dough ball and press into a rectangular shape. Pick up the dough rectangle and place it on one of the floured parchment rectangles. Press the dough into a larger rectangle. Using a rolling pin, roll the dough out into a rectangle until it is about ⅛ inch thick.
- Add the cheese and shape the dough into boats: Divide the cheese into two portions* so that half goes into each khachapuri. Take half of the cheese from one portion and spread it across the top and bottom in parallel lines about an inch from the long side of the dough. This is the crust of the dough which will ultimately form the cheese-stuffed crust. Roll one side of the dough down so that the melted cheese is completely trapped in the dough. Really press down against the seams so that when the cheese melts while baking, it stays inside the crust. Repeat with the other side. Press the two sides together on the short side, twist several times and tuck the end underneath so that the twist does not unravel. Take the remaining portion of the cheese and place it in the middle hollow of the Khachapuri. Pick up the dough by lifting it up the parchment and transfer to the baking sheet. Cut around the edges of the parchment so that the parchment of the two khachapuri does not overlap. Repeat this process and make the second Khachapuri.
* If you want to make four khachapuri's so that each person has their own khachapuri, simply adjust the recipe accordingly.
Bake the Khachapuri
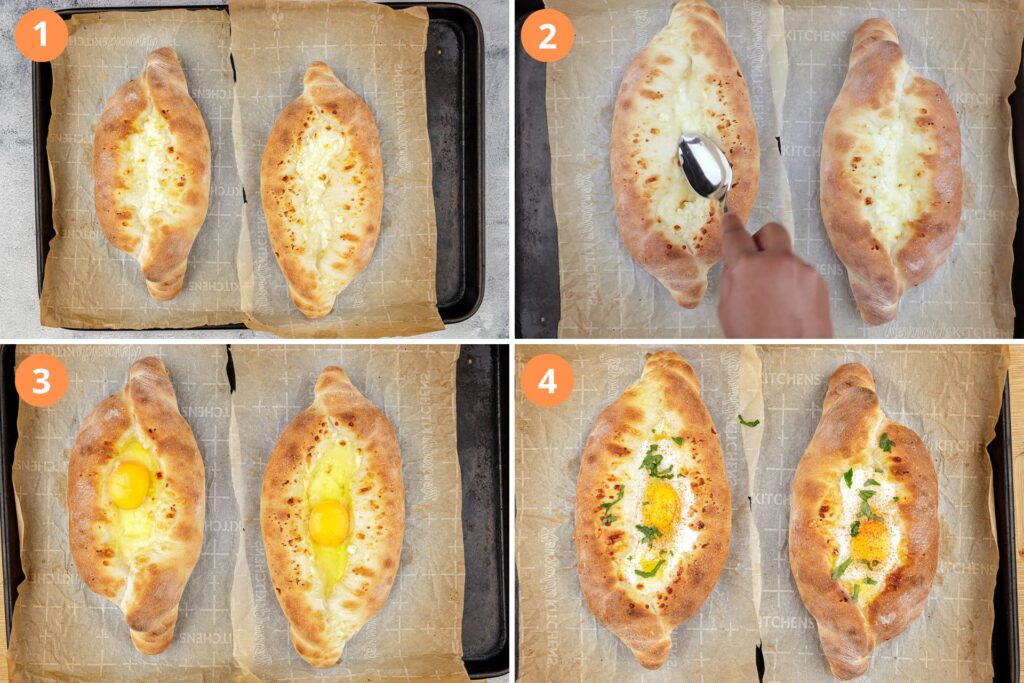
- Bake the khachapuri: Bake at 475°F until the dough is golden brown - about 15 minutes.
- Make room for the egg: Remove the khachapuri from the oven and press down the melted cheese in the middle portion of the khachapuri with a spoon to make room for the egg.
- Bake the egg: Pour the egg into each khachapuri. Bake for 3-4 minutes or until the egg is just set. At this point the egg will look like it is still raw, - this is deliberate – the eggs continue to cook even after they are removed from the oven. They will be perfectly done by the time the dish is ready to eat.
- Garnish: Once the Khachapuri is done, tuck in some butter, sprinkle with salt, cayenne pepper and chopped cilantro. Serve immediately.
Tips to make the best Khachapuri
- Parchment really helps when rolling and shaping the dough. Khachapuri is a very wet dough so it can get sticky and messy. Using parchment as a base helps you to move it around more easily.
- Make the indentation for the egg wide and shallow. This allows the egg to spread out and helps the yolk cook more quickly.
- Do not overbake the egg. The eggs continue to cook even after they were removed from the oven. They will be perfectly done by the time The dish is ready to eat.
Can I make the dough ahead of time?
Yes, for optimal flavor the dough can be made the day before. If the dough is kept in the fridge longer, the texture of the baked bread will taste more chewy - like pizza dough, not soft and fluffy.
- To make the dough ahead of time substitute the instant dry yeast with a ½ teaspoon on active dry yeast. Otherwise the longer time will cause the dough to over proof.
- Refrigerate the dough right after the first proof. I like to split the dough into two equal pieces and shape into balls before refrigeration because it warms to room temperature faster when you take it out. Grease each ball with a little olive oil so the skin does not dry out. Cover with plastic wrap or an air-tight lid and store in the refrigerator overnight.
- Take out the dough and allow it to come to room temperature - about 30-40 minutes. Then proceed to shape into boats, fill with cheese and bake as directed in the recipe.
Storage and Freezer Instructions
Refrigerator: Khachapuri is best eaten fresh from the oven. Leftovers can be stored in the refrigerator in an air-tight container for about 2 days.
Freezer: You can freeze the baked or unbaked shaped Khachapuri without the egg in the freezer for up to 3 months. The Khachapuri should be wrapped with foil and then stored in an air-tight freezer-safe container or Ziploc bag.
How to reheat Khachapuri
Khachapuri is best eaten as soon as it is made. It is difficult to reheat Khachapuri because the runny yolk will lose its runny texture during the baking process.
To lightly warm the khachapuri and retain the runny egg yolk texture:
- Place the khachapuri on the cold skillet and turn the stove on medium. If the bottom of the khachapuri starts to brown too quickly, turn the heat to low or medium-low. Heat the khachapuri until it is lightly warmed.
To fully heat the khachapuri, melt the cheese but not retain the runny egg yolk:
- Skillet: Place the khachapuri on the cold skillet and turn the stove on medium. Add a few drops of water to the skillet and cover it. Warm until fully heated through.
- Oven: Wrap the khachapuri with aluminum foil. Place on a baking sheet in the middle of a cold oven. Begin by heating the oven to 300°F. The khachapuri is done when it is heated through, and the cheese filling has melted - about 30 minutes.
- Microwave: Place the khachapuri on a wet paper towel in the microwave. Microwave in 30 second intervals until fully heated through and the cheese is gooey. Because microwaved bread can lose much of its texture, heat up the khachapuri just enough to warm it.
- Toaster oven: Place the khachapuri on a small piece of foil (for easy clean up) on a baking tray. Transfer to the bottom rack of the toaster oven. Select the 'Bake' function and set the temperature to 325°F. The khachapuri is done when it is heated through, and the cheese is gooey - about 5-8 minutes.
- Air-fryer: Set the air fryer to 325°F and 5 minutes. For easy clean-up, line the air-fryer with parchment. Cut the khachapuri to fit into the air fryer basket if needed. Air fry until the khachapuri is heated through.
How to serve Khachapuri
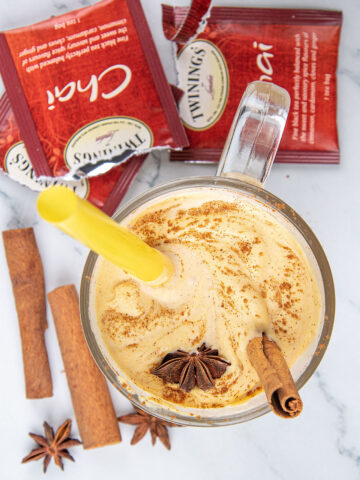
Khachapuri is best served warm, right out of the oven. It is a particularly impressive as a brunch or breakfast dish. Since the dish is so hearty, it is best paired with a breakfast beverage like Cappuccino or a refreshing side salad like Lebanese Tabbouleh. For and EPIC end to this delicious meal try our Starbucks Copycat Iced Chai Latter with Pumpkin Cold Foam.
The gooey cheese bread is also excelled as a side dish for soups and stews. Khachapuri goes particularly well with French Onion Soup.
Variations
Georgian khachapuri has numerous variations based on the type of ingredients available in the region and household preferences.
- Imeruli khachapuri - this khachapuri looks like a flat, closed,or covered pie. The cheese and egg is inside the dough.
- Adjarian khachapuri - In Abkhazia, is baked in multiple layers, like a dry, sauce-less lasagna.
- Gurian khachapuri- Also referred to as Guruli Khachapuri, it is a type of khachapuri where the bread is closed and crescent shaped, like a calzone.
Other variations include the use of different types of regional cheese and the introduction of new ingredients like potato (Ossetian or Osuri khachapuri).
Nutrition
A single serving of this Khachapuri Recipe has about 590 calories, 30g of fat and 52.7g of carbohydrates.
This recipe yields approximately four servings. The nutrition guidance is intended for informational purposes only. Please use it as a general guideline. If the nutrition information is important to you, you should independently verify it using your preferred tool.
FAQs
Khachapuri, is Georgian and is the national dish of Georgia. It is a cheese-filled bread that is molded into various shapes like boats or crescents, with an egg on a bed of cheese in the center. While Khachapuri is a popular street and restaurant dish in Armenia and surrounding areas, its true roots lie in Georgia.
The English name for Khachapuri is "Georgian Cheese Bread." It is also known as "Georgian Cheese Bread Boat" because of the boat shape of the bread which is lined with cheese and has an egg in the center.
The egg is perfectly cooked with the yolk still deliciously runny, in Khachapuri. This is accomplished by dropping a raw egg into the steaming hot bread and cheese as soon as it comes out of the oven. The khachapuri is then placed back into the oven so that the egg just sets around the edges but still raw in the center - about 3-4 minutes. The warmth of the freshly baked khachapuri cooks the egg to perfection within minutes.
Khachapuri has a creamy texture from the egg with salty yet tangy undertones from the cheese. The freshly baked bread is warm and fluffy with a lightly chewy crust on the outside. Since all the ingredients are freshly baked the cheese and egg flavors soak into the freshly baked bread resulting in a much more intensive, flavorful experience. It is the gourmet version of the humble egg, cheese, and toast sandwich.
The best cheese for the gooey cheese bread is a combination of tangy and salty feta cheese and mozzarella cheese. In this recipe we added a third cheese - Monterey Jack, for a little more flavor and texture. When substituting any of the cheese mixture it is important to remember the texture and flavor that go best with the egg and bread. Sulguni cheese, which is used in the traditional Georgian dish tastes sour with a moderately salty flavor - so a goat cheese will typically fit the flavor and texture profile. For added creaminess to the molten cheese you could also use cottage cheese or ricotta cheese.
You can absolutely use an egg wash made with a beaten egg white to give the bread a more shiny surface.
You can use store-bought pizza dough for this recipe - please note that the dough will be a little more chewy - not as soft and fluffy as the dough described here.
We do not use a pizza stone as it changes the soft, fluffy bread texture to one that is crispy and chewy like pizza dough. Having said that both types of bread are very tasty. If you prefer a crispier, chewier pizza-like dough, use the pizza stone.

Khachapuri Adjaruli | Georgian Cheese Bread Boat
Equipment
- 1 Large mixing bowl
- 1 Medium sized bowl
- 1 wooden spoon or Danish dough hand whisk
- 1 dough scraper
- 1 whisk or fork
- 1 basting brush optional
- 2 parchment paper rectangles 12 x 15 inches each
- 1 baking sheet
- 1 Rolling Pin
Ingredients
For the dough
- 2 cups all-purpose flour 250 grams, plus more for dusting
- ⅓ cup warm water 70 milliliters
- ½ cup warm whole milk 120 milliliters
- 1 teaspoon white granulated sugar 4 grams
- 1 teaspoon table salt 6 grams
- 1 teaspoon instant dry yeast 3 grams
- 2 teaspoon olive oil 10 milliliters
For the cheese blend
- 3 ounces mozzarella cheese low moisture
- 3 ounces Monterey Jack cheese
- 6 ounces feta cheese
For the rest
- 2 large eggs
- 1 Tablespoon cold butter sliced into 4 pieces
- ½ teaspoon sea salt to taste
- ¼ teaspoon cayenne pepper optional
- 1 teaspoon fresh cilantro optional, sliced
- 1 teaspoon fresh chives optional, sliced
Instructions
Make the dough
- Mix the dough: Add the warm water, instant dry yeast, and sugar to a bowl. Mix vigorously with a whisk. Add warm milk, olive oil, flour, and salt. Mix with a wooden spoon or Danish dough hand whisk until no dry dough is visible. The dough will be shaggy and wet. Knead the dough (3 minutes): Using a dough scraper or a large spoon, scrape the shaggy dough into a ball and transfer it to a lightly floured surface. Sprinkle some flour on the dough ball and knead the dough for about 3 minutes by pulling out long bits from the side and pressing it into the center. Once the dough is smooth and silky, tighten is into a ball by pressing it with both hands in a rotating motion. Proof the dough: Place the smooth dough ball into a mixing bowl. Drizzle with a little olive oil. Smear the olive oil all over the dough ball including the bottom. Cover and proof for about 1 to 1 ½ hours in a warm place or until the dough doubles in size.

Prep while the dough proofs
- Mix the cheese: Mix the shredded feta, Monterey Jack cheese and mozzarella in a medium sized bowl. Set aside and store in the refrigerator until ready to use. Prepare the parchment: Cut some parchment paper into two 12x15 inch rectangles. Sprinkle the parchment rectangles with a little flour.

Shape and stuff khachapuri
- Preheat the oven at 475°F: Once the dough has doubled in size, begin preheating the oven. Set the oven rack in the middle. Roll out the dough: Using a plastic dough scraper or a large spoon, loosen the proofed dough from the sides of the large mixing bowl and pour onto a well-floured surface. Shape the dough into a circle and cut the dough into two pieces using the dough scraper. Take one dough ball and press into a rectangular shape. Pick up the dough rectangle and place it on one of the floured parchment rectangles. Press the dough into a larger rectangle. Using a rolling pin, roll the dough out into a rectangle until it is about ⅛ inch thick.Add the cheese and shape the dough into boats: Divide the cheese into two portions* so that half goes into each khachapuri. Take half of the cheese from one portion and spread it across the top and bottom in parallel lines about an inch from the long side of the dough. This is the crust of the dough which will ultimately form the cheese-stuffed crust. Roll one side of the dough down so that the melted cheese is completely trapped in the dough. Really press down against the seams so that when the cheese melts while baking, it stays inside the crust. Repeat with the other side. Press the two sides together on the short side, twist several times and tuck the end underneath so that the twist does not unravel. Take the remaining portion of the cheese and place it in the middle hollow of the Khachapuri. Pick up the dough by lifting it up the parchment and transfer to the baking sheet. Cut around the edges of the parchment so that the parchment of the two khachapuri does not overlap. Repeat this process and make the second Khachapuri.* If you want to make four khachapuri's so that each person has their own khachapuri, simply adjust the recipe accordingly.
Bake the Khachapuri
- Bake the khachapuri: Bake at 475°F until the dough is golden brown - about 15 minutes. Make room for the egg: Remove the khachapuri from the oven and press down the melted cheese in the middle portion of the khachapuri with a spoon to make room for the egg. Bake the egg: Pour the egg into each khachapuri. Bake for 3-4 minutes or until the egg is just set. At this point the egg will look like it is still raw, - this is deliberate – the eggs continue to cook even after they are removed from the oven. They will be perfectly done by the time the dish is ready to eat. Garnish: Once the Khachapuri is done, tuck in some butter, sprinkle with salt, cayenne pepper and chopped cilantro. Serve immediately.

Video
Notes
-
- Parchment really helps when rolling and shaping the dough. Khachapuri is a very wet dough so it can get sticky and messy. Using parchment as a base helps you to move it around more easily.
- Make the indentation for the egg wide and shallow. This allows the egg to spread out and helps the yolk cook more quickly.
- Do not overbake the egg. The eggs continue to cook even after they were removed from the oven. They will be perfectly done by the time The dish is ready to eat.

DID YOU MAKE THIS RECIPE?
We'd love to hear how it turned out. Please take a picture and tag us on Instagram @cloveandcumin!
Looking for more recipes?
Other Delicious Breakfast Ideas

Other Global Recipes
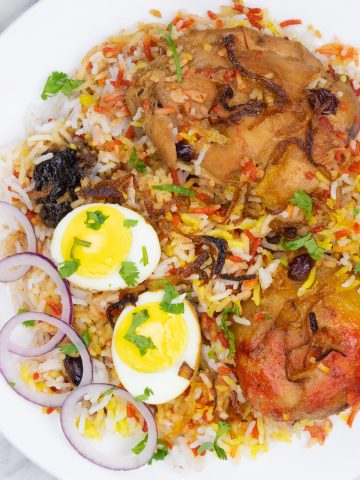
- How to Make Delicious Chicken Dum Biryani in Oven3 Hours 30 Minutes
- Easy French Onion Soup Recipe Without Wine or Alcohol1 Hours 20 Minutes
- Authentic Neapolitan Pizza Dough Recipe - Chewy Crust41 Hours 30 Minutes
- How to Make Beef Koobideh | Grilled Persian Kabobs45 Minutes


Kate
Stunning presentation! Thanks for the recipe. They came out great.
Lima
Awesome! Thank you so much for letting us know!
dana
This looks amazing! Your instructions make this seem so approachable too. I can't wait to try it. I wouldn't normally be so confident moving out of my comfort zone but you make it seem doable and it looks too delicious to pass up.
Lima
Wonderful! Please let us know if you try it!
Lima and Tareq
Michelle
This is just perfect for brunch and your instructions were so clear it made it very easy to follow the recipe! They turned out really great and very tasty.
Lima
Thank you Michelle. We are so glad that you liked it.
Lima and Tarew
Beth Sachs
What a delicious hearty breakfast this is!
Kristine
First of all, this is stunning to look at. Second of all, it tastes even better! I really appreciated the egg on top. So good.
Lima
Glad that you liked it!
Thanks,
Lima and Tareq
Andrea
Oh my goodness, what a wonderful breakfast! I love that the cheese is baked into the fresh bread. It makes all the difference.
Lima
We think so too! One of our new go-to favorites.
Lima and Tareq
Gianne
The cheese-filled bread boat with a perfectly runny egg on top was a delightful combination of flavors. Highly recommend giving it a try!
Lima
Awesome - Lima and Tareq
Kechi
What a beautiful brunch recipe idea. I have bookmarked this to try later; thanks so much for sharing!
Lima
Thank you so much Kechi!
Lima and Tareq