


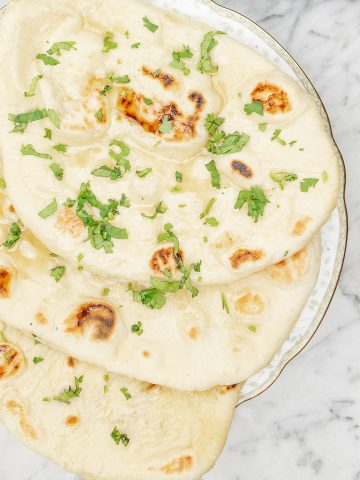
Nothing beats the taste of warm, puffy, freshly baked Lebanese pita bread. This recipe is so easy, you'll wonder why you ever settled for store-bought pita.

What is pita bread?
Pita, also known as 'pitta' or 'Arabic khubz' bread is a yeast-based flatbread renowned for its signature giant pocket. Its origins can be traced to the Mediterranean and surrounding areas. The earliest documented records of this bread date back 4,000 years to the Babylonian culture of Mesopotamia, some 4,000 years ago. The version featuring the "pocket" is thought to have emerged more recently.
Pita bread is most famous in the U.S., notably for its use in shawarma, a popular Middle Eastern sandwich consisting of thinly sliced grilled meat, salad and sauces stuffed into the pita pocket. Beyond its role as a side and in sandwiches, pita bread is used in a variety of other ways in Middle Eastern cuisine. It can be cut into triangles and fried to make dipping chips, transformed into croutons for salads and even covered with delicious ingredients and baked, creating a pizza of sorts.

Why make homemade Pita Bread?
Because at the end of the day the taste, texture and fragrance is what its all about. If you are going to eat one of history's most famous breads, you really need to try and experience that authentic taste.
In Lebanon, pita bread is made at home or purchased warm, freshly baked from a local bakery. It is eaten while you can still smell that just-out-of-the oven deliciousness. In contrast, store-bought pita bread commonly found in grocery stores tend to be a little dry and stale like ordinary sandwich bread. Even if you heat it up with a few drops of water, the sensation falls short. recipe is excellent for making homemade shawarma bread.

But can you get that flavor with just a home oven?
Yes you can!
Here is the simple trick: preheat your oven to 500°F with a pizza stone, baking stone, baking steel or inverted cast iron skillet inside. Place the raw, uncooked pita on the blazing-hot stone surface. The intense heat causes the water in the dough to evaporate, creating steam which "inflates" and creates the signature pocket.

Ingredients for this homemade pita bread recipe

All the ingredients for this pita recipe can be easily obtained from your local grocery store. Here is what you need to make the softest, fluffiest pita bread ever!
- Whole wheat and All-purpose flour - This recipe uses a combination of whole wheat and all-purpose flour to get the right bread texture and flavor. Note: You can absolutely change the proportions of whole wheat and all-purpose flour just remember that it will result in a corresponding change in the flavor and texture of the bread. Whole wheat flour adds more nuttiness and heaviness to the bread. All- purpose will make the pita more soft and allow a more intense yeast flavor.
- Warm water - The water temperature is important because it helps create the right environment for the yeast to activate. Too cold water will cause the yeast to work more slowly, boiling water will kill the yeast.
- Instant dry yeast - I use instant dry yeast because it works a lot faster.
- Sugar - Adding a little sugar helps activate the yeast a little faster. The use of sugar is completely optional - it is not traditionally used on pita bread recipes.
- Olive oil - Olive oil adds flavor and also helps make the bread tender.
- Table Salt - salt is used to flavor the bread.
Can I make a gluten-free version?
Absolutely. Simply replace the flour in the recipe with the same amount of gluten free flour. I have had good results with Bob's red Mill all-purpose gluten free flour.
Do I need a stand mixer?
No, you do not need a stand mixer for the easy pita bread recipe. You can knead the dough by hand and unlike other doughs, the process is not long and tedious. In fact many like to hand-knead dough as the process is quite therapeutic and relaxing.
How to make Lebanese Pita Bread
Knead the dough

- Pour the lukewarm water, yeast and sugar (optional) into the mixing bowl of a stand mixer. Stir. To check whether the yeast is fresh, let the mixture stand, uncovered, in a warm place. If the yeast is fresh, it will activate and be bubbly within 15 minutes.
- Add the whole wheat, all-purpose flour, salt and olive oil to the activated yeast mixture. Using a dough hook attachment, mix on low speed in a stand mixer until the dough comes together - about 3 minutes. Raise the speed to medium and mix. The dough is done when it is smooth and elastic but still sticky and separates cleanly from the side of the mixing bowl - about 3-5 minutes. Note: the dough can also be mixed in a large mixing bowl with a wooden spoon and then kneaded by hand.
First proof - about 1 ½ hours

- Liberally grease a large bowl with olive oil. Pour the dough into the greased bowl and turn the dough over a few times to ensure that the entire surface of the dough is covered with oil. Allow the dough to rest in a warm spot covered with a damp towel. The proof is complete when the dough doubles in size - about 1- 1 ½ hours.
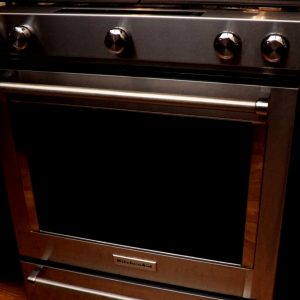
Preheat the oven (if baking)
- Place a pizza stone on the middle rack. If you don't have a pizza stone or pizza steel, use an inverted griddle or cast iron skillet. A baking sheet gives less than optimal results because it does not retain as much heat.
- Preheat the oven to 500°F. Once the oven reaches 500°F allow it to continue to heat for 30 minutes.
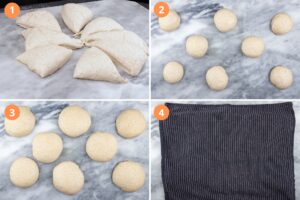
Second proof - 15 minutes

- Transfer the dough onto a lightly floured surface.
- Divide the dough into 8 even pieces. Round each piece into a ball. Tuck in any seams underneath the ball. Place on a baking tray with enough space for the dough to double. Brush all exposed sides with a little olive oil.
- Cover with a wet towel, and rest for 15 minutes. Note: If making the dough in advance, place the dough balls in plastic container and refrigerate for up to 3 days. Allow to rest for 30 minutes (to come to room temperature) before proceeding to the next step.
Shape the dough

- Cut some parchment paper into 8, 7 inch x 7 inch squares. To stop the parchment from curling, crumple each piece so it lays flat.
- Place a dough ball onto a crumpled parchment square. Using a flour-dusted rolling pin, roll each dough ball into a 7 inch diameter circle. Each dough circle should be about a ¼ inch thick and will just fit the parchment square. Cover the rolled dough circle with a wet towel. Repeat with the remaining dough balls. If desired, stack the dough circles making sure there is piece of parchment in between each circle. Make sure that the dough balls and circles are covered at all times to prevent them from drying out.
Bake the pita in an oven or stovetop

- Oven: Using a pizza paddle (If available) place 1-2 dough circles on the pizza stone toward the back of the oven. Bake until puffed and golden brown - about 2 minutes. There is no need to flip the pita. Wait 1-2 minutes for the oven to heat up again. Repeat with the remaining dough. Note: The pita will not puff up if the oven temperature drops.
- Stovetop: Heat a cast iron skillet over medium-high heat. Lightly brush with olive oil. Add a rolled-out pita. Once bubbles begin to form, (about 30-40 seconds) flip the pita. The pita should fully puff up in about a minute. Flip once more and cook for even browning - about 2 minutes. Cool the pita on a wire rack and cover with a towel.

Tips to make the best Lebanese Pita Bread
- Roll the dough on parchment - This ensures that the dough circle is the right size and also allows you to easily place the dough on the baking surface.
- Make sure the pita bread dough does not dry out - It is important to brush the dough balls with oil and cover the dough balls and dough circle with a wet kitchen towel while waiting to prep or bake.
- Moisture is the secret to the giant pocket - The kneaded dough should be smooth but still a little sticky - you want a high moisture dough because the giant pocket is created when the moisture in the dough evaporates.
- Pita will not puff up if the oven temperature falls - If the pitas stop puffing up, close the oven door for about 5 minutes so that the oven can heat up before baking more pitas. Allow the oven to heat up for 1-2 minutes before baking more bread.
- A pizza stone, pizza steel, cast iron griddle or inverted cast iron skillet is better than a baking sheet. Heat retention is key to getting puffed pita bread.

Troubleshooting: Why won't my pita puff up?
The main reason why pita bread does not puff up is because the oven is not hot enough. Sometimes when I make my pita bread, the first few puff up and then they don't. I found that it was because the temperature of my oven had fallen below 500°F because I kept opening the oven door to insert, flip and remove the baked bread. Closing the oven door and waiting about 1-2 minutes for the oven to heat up before baking another batch solved the problem.
The pita may also not puff up if the surface on which it is baking is not hot enough. You need a super hot surface that retains heat like a pizza steel or stone. An inverted cast iron pan also works very well as does a griddle. We were unable to get optimal results with a baking tray/cookie sheet because it did not get hot enough.
Can I make the dough ahead of time?
Yes! Once you make the dough balls, store it in the fridge for later use - it will keep for about a week. When ready, take out the dough balls and leave them on the counter until they double in size - about 1-1 ½ hours. Roll out the dough balls and continue as directed in the recipe.
Storage and freezer instructions
Counter: Freshly baked pita can be cooled, then stored in an airtight container for about 3-4 days.
Refrigerate: Fresh pita can be stored in an airtight container in the refrigerator for up to a week. Make sure the pita is completely cool before putting it in the fridge.
Freeze: Completely cool the bread, then freeze individually on a tray. Once frozen stack the pita with a piece of parchment in between and tightly wrap in aluminum foil or plastic wrap or store in an airtight container or freezer bag. Frozen pita lasts for about 6 months.
Defrost: Allow the pita to defrost on a counter for an hour or overnight in the refrigerator. See directions below to warm the defrosted bread.
How to reheat pita bread
There are several ways to quickly and conveniently heat up pita bread. The secret is to perfect pita is to spray it with a little water prior to heating so that the steam softens and moistens the bread.
- Microwave (best for 1-2 pitas): Wrap the pita in a wet paper towel and microwave until warm.
- Stovetop (best for 1-2 pitas): Heat a skillet on medium-high heat. Transfer the the pita bread to the skillet. Sprinkle with a little water so that the steam moistens and freshens the bread.
- Open flame (best for a few pitas): Pitas can be quickly heated over an open flame from a grill or a gas stove top. Just remember to turn it often and watch the bread as it can get charred very quickly.
- Oven (best for large batches): Heat the oven to 375°F. Place the pita on a lined baking sheet and sprinkle with a little water. Bake until warm - about 8-10 minutes.

How to serve Pita Bread
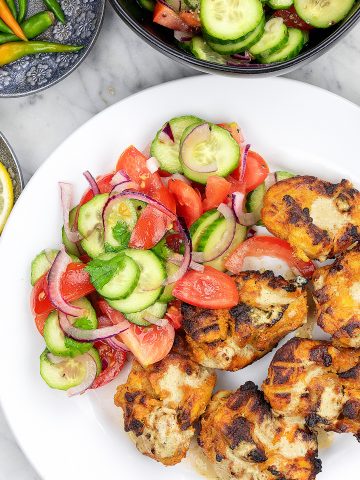
Pita is one of the most versatile foods available and is best served warm or at room temperature. It accompanies main dishes like grilled lamb , like Beef Seekh Kabab, chicken and falafel flawlessly.
It is also pairs beautifully with a variety of dips like hummus, tahini, baba ghanoush, tzatziki and pickled onions.
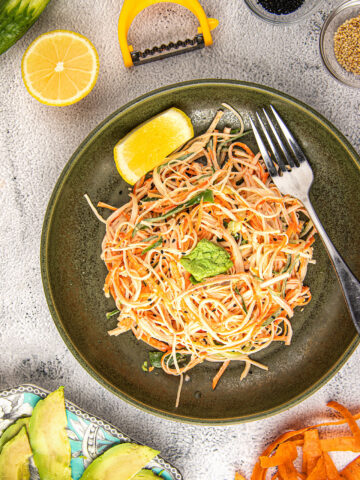
A popular street version is to stuff pita pockets with grilled meat, pickled onions and salad. The resulting sandwich is called a shawarma or gyro (e.g., lamb shawarma, chicken shawarma or chicken gyro). These sandwiches are then generously drizzled with sauces like tahini, tzatziki and chili sauce. You can also stuff the pitas with non-Middle Eastern foods like Japanese Spicy Kani Salad.
Fun ways to eat pita include eating them as toasted pita triangles (pita chips), as a unique base for pizza and as crispy croutons on a salad.
Nutrition
A single serving of this Lebanese Pita Bread has about 201 calories, 3.5 grams of fat,, 4.7 grams of protein, and 35.9 grams of carbohydrates.
This recipe yields approximately eight servings. The nutrition guidance is intended for informational purposes only. Please use it as a general guideline. If the nutrition information is important to you, you should independently verify it using your preferred tool
Variations
Garlic Pita Bread: In a small saucepan heat salted butter and minced garlic until the garlic is lightly toasted. Add some fresh or dried parsley and stir. Brush the garlic butter on warmed pita bread.
Cheesy-Garlic Pita Crisps: In a small saucepan heat salted butter and minced garlic until the garlic is lightly toasted. Add some fresh or dried parsley and stir. Brush the garlic butter on warmed pita bread. Cut the pita into wedges and place on a foil or parchment-lined baking sheet. Sprinkle the pita wedges with grated parmesan cheese. Bake in a 350°F pre-heated oven until the wedges are crisp - about 10 minutes.
FAQs
Greek bread is thicker than Lebanese pita bread and does not have a pocket.
Naan bread is an Indian style pita bread. In addition to flour, water salt and yeast it contains ghee instead of olive oil and may include additional flavorings like yogurt, egg, herbs and spices. Plain naan bread is a fluffy, chewy flatbread while pita bread is is smaller and drier with a 'pocket' inside which can be stuffed with a variety of fillings.
Arabic bread is the same as pita bread. This type of bread also goes by other names like Syrian bread, pocket bread, balady, shamy and khubz.
Pita bread is the same as Lebanese bread. This type of bread also goes by other names like Arabic bread, Syrian bread, pocket bread, balady, shamy and khubz.

DID YOU MAKE THIS RECIPE?
We'd love to hear how it turned out. Please take a picture and tag us on Instagram @cloveandcumin!
Looking for more recipes?
Delicious Fillings for Pita Bread


Bread Recipes
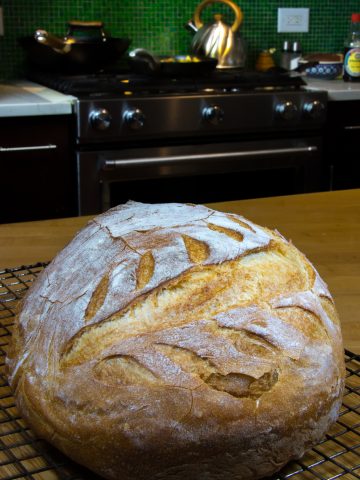
- Traditional Soft Naan Bread - Easy Stove-Top Recipe1 Hours 40 Minutes
- Two Hour Artisan Bread -Easy Fast Bread Recipe2 Hours
- Roti (Bengali Flatbread)20 Minutes
- Rustic No Knead Bread Recipe Without A Dutch Oven49 Hours 20 Minutes


Easy Homemade Lebanese Pita Bread Recipe (Shawarma)
Equipment
- 1 pizza steel or pizza stone
- 1 Large mixing bowl
- 1 Wooden Spoon, or utensil to stir the dough
- 1 Rolling Pin
- 1 Electric Stand Mixer optional
- 1 plastic bench scraper optional
Ingredients
- 1 ¼ cup warm water (100-110°F) 285 milliliters
- 1 Tablespoon instant dry yeast 10 grams
- ½ teaspoon white granulated sugar 2 grams, optional
- 1 cup whole wheat flour 150 grams
- 1 ⅔ cups all-purpose flour 250 grams, plus more for dusting
- 2 Tablespoons olive oil 23 milliliters, plus more for greasing
- 1 teaspoon salt 7 grams
Instructions
Knead the dough
- Pour the lukewarm water, yeast and sugar (optional) into the mixing bowl of a stand mixer. Stir. To check whether the yeast is fresh, let the mixture stand, uncovered, in a warm place. If the yeast is fresh, it will activate and be bubbly within 15 minutes. Add the whole wheat, all-purpose flour, salt and olive oil to the activated yeast mixture. Using a dough hook attachment, mix on low speed in a stand mixer until the dough comes together - about 3 minutes. Raise the speed to medium and mix. The dough is done when it is smooth and elastic but still sticky and separates cleanly from the side of the mixing bowl - about 3-5 minutes. Note: the dough can also be mixed in a large mixing bowl with a wooden spoon and then kneaded by hand.

First proof - about 1 ½ hours
- Using a dough scraper or your hands, scrape away the dough from the sides of the mixing bowl to form a smooth ball. The seam side should be underneath the ball.Drizzle a little olive oil on top and cover the entire surface of the dough ball including the bottom with oil. Cover the bowl with a damp towel or silicone cover and place it in a warm spot. Let the dough rise until it doubles in size - about 1- 1 ½ hours.

Preheat the oven
- Place a pizza stone on the middle rack. If you don't have a pizza stone or pizza steel, use an inverted cast iron skillet. Preheat the oven to 500°F. Once the oven reaches 500°F allow it to continue to heat for 30 minutes.
Second proof - 15 minutes
- Transfer the dough onto a lightly floured surface. Divide the dough into 8 even pieces. Shape each piece into a ball. Tuck in any seams underneath the ball. Place on a baking tray with enough space for the dough to double. Brush all exposed sides with a little olive oil. Cover with a wet towel, and rest for 15 minutes.* If making the dough in advance, place the dough balls in a plastic container and refrigerate for up to 3 days. Allow to rest for 30 minutes prior to proceeding to the next step.
Shape the dough
- Cut some parchment into 8 7 inch x 7 inch squares. To stop the parchment from curling, crumple each piece of parchment and smooth out so it stays flat.Place a dough ball onto the parchment square. Using a flour-dusted rolling pin, toll each dough ball into a 7 inch diameter circle. Each dough circle should be about a ¼ inch thick and will just fit the parchment square. Cover the dough circle with a wet towel. Repeat with the remaining dough balls. The dough circles can be stacked since there will be a piece of parchment in between. Make sure that the dough balls and circles are covered at all times to prevent them from out.

Bake the pita
- Oven: Place 1-2 dough circles on the pizza stone. Bake until puffed - about 2 minutes. Repeat with the remaining dough. Note: The pita will not puff up if the oven temperature drops. If this happens, just stop baking and let the oven reheat for about 2-4 minutes.Stovetop: Heat a cast iron skillet over medium-high heat. Lightly brush with olive oil. Add a rolled-out pita. Once bubbles begin to form, (about 30-40 seconds) flip the pita. The pita should fully puff up in about a minute. Flip once more and cook for even browning - about 2 minutes. Cool the pita on a wire rack and cover with a towel.

Video
Notes
- Make sure the dough does not dry out - It is important to brush the dough balls with oil and cover the dough at all times . This prevents the dough from drying out - the water in the dough creates the steam necessary for the pita to puff up and get its signature pocket.
- Moisture is the secret to the giant pocket - The kneaded dough should be smooth but still a little sticky - the ideal kneaded pita bread dough is a little sticky before the first proof.
- Pita will not puff up if the oven temperature falls - If the pitas stop puffing up, close the oven door for about 2-4 minutes so that the oven can heat up before baking more pitas.
Dannii
This bread was perfect. So light and fluffy. I can't wait to make it again.
Lima
I am so glad that you liked it!
Thanks, Lima
Anjali
I had no idea it was so easy to make your own homemade pita bread at home! This tasted so much better and fluffier than store bought! I'm going to be making this recipe again and again!
Lima
Thrilled to hear that you liked our recipe!
Thank you for letting us know.
Lima and Tareq
Gina
I can safely say goodby to store bought after making this on my own. They came out perfect! Nothing like homemade!
Lima
I am so glad!
Thank you
Lima and Tareq
Lima
We agree!
Thank you so much,
Lima and Tareq
Suja md
This looks and sounds fabulous! Love this recipe.
Lima
Awesome! We are so delighted that you liked it!
Thank you, Lima and Tareq
Whitney
I love this homemade recipe!! It's so easy to make and the recipes to go with it are endless.
Lima
Whitney - thank you so much for checking out my recipe! Please let me know if you try it.
Lima
Anthony
I loved these! the taste of the whole wheat was so good - so much better than anything store bought
Lima
Glad you liked it!
Lima
Ali
This pita bread is amazing, making your own at home just does not compare to the store bought ones!
Lima
I agree! Thank you so much! Lima
sophie
Pure pillowy perfection! The aroma, the texture – it's like a slice of Middle Eastern heaven right in my kitchen. Such a rewarding recipe to make!
Lima
I am so glad you liked it Sophie! Thank you - Lima
Vanessa
This was so easy with the stand mixer! I don't think I can go back to storebought now!
Lima
I agree - I am so glad you liked it! Lima